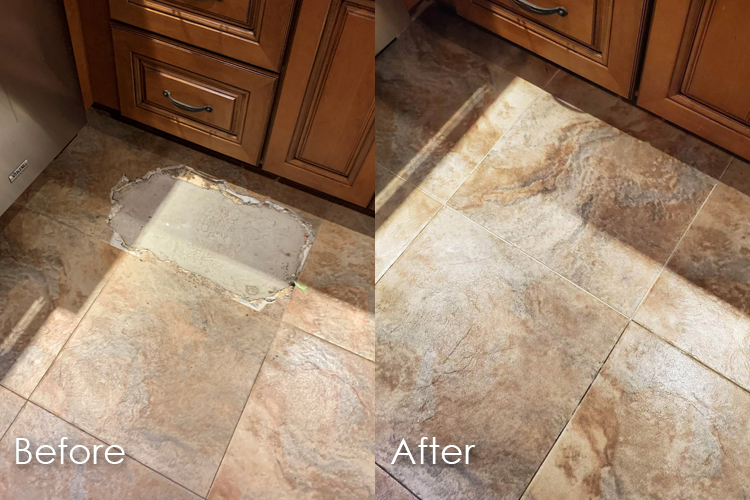
Tile Troubles? Easy Steps to Fix a Broken Tile
Tiles are a popular and durable flooring choice, but accidents happen. Don’t worry; fixing a broken tile is a manageable DIY project. Follow these steps for a seamless repair that restores the beauty of your tiled surfaces.
Assessing the Damage:
Begin by assessing the extent of the damage. Determine whether the tile is chipped, cracked, or completely shattered. This evaluation helps you understand the repair needed and whether the tile can be fixed or requires replacement.
Gathering Your Materials:
Before diving into the repair, gather the necessary materials. You’ll need replacement tiles (if the damaged tile is irreparable), a hammer, chisel, putty knife, adhesive, grout, a sponge, and a cloth. Ensure the replacement tile matches the existing ones for a cohesive look.
Removing the Broken Tile:
Start by carefully removing the broken tile. Use a hammer and chisel to break the tile into smaller pieces, then use a putty knife to remove any remaining adhesive and grout. Be cautious to avoid damaging surrounding tiles during this process.
Preparing the Substrate:
Clean the substrate thoroughly to remove any adhesive residue or debris. A clean surface ensures proper adhesion for the new tile. Use a putty knife or scraper to scrape away any stubborn remnants, and wipe the area with a damp cloth.
Applying Adhesive:
Once the substrate is clean, apply tile adhesive evenly using a notched trowel. Spread the adhesive over the area where the new tile will be placed, ensuring full coverage. The adhesive creates a secure bond between the substrate and the tile.
Placing the Replacement Tile:
Carefully place the replacement tile onto the adhesive, aligning it with the surrounding tiles. Press the tile firmly into place, ensuring it sits flush with the adjacent tiles. Use a level to check for evenness, making any adjustments as needed.
Allowing Adhesive to Set:
Allow the adhesive to set according to the manufacturer’s instructions. This curing time ensures a strong bond between the tile and the substrate. Avoid putting weight on the repaired area during this period to prevent shifting.
Grouting the Tile:
Once the adhesive has set, it’s time to grout the tile. Mix the grout according to the package instructions and apply it using a rubber float. Press the grout into the spaces between the tiles, ensuring a uniform and smooth finish.
Cleaning Excess Grout:
After grouting, use a damp sponge to clean any excess grout from the tile surfaces. Wipe the tiles diagonally to avoid disturbing the freshly applied grout lines. Allow the grout to cure completely before exposing the repaired area to moisture.
Final Touches:
Inspect the repaired tile for any remaining adhesive or grout residue. Use a cloth or sponge to polish the tile surfaces, ensuring a clean and polished appearance. Step back and admire the seamless repair that blends with the surrounding tiles.
Designing Temptation: Your Go-To for Home Repairs
For more home improvement ideas and expert advice, visit DesigningTemptation.com. Their comprehensive resources cover a range of topics to help you tackle various projects and maintain a visually appealing home.
