Transform Your Space: Painting the Dining Room

Transform Your Space: Painting the Dining Room
Introduction: The Power of Paint in Home Transformation
Painting your dining room is a powerful and cost-effective way to refresh and revitalize your living space. In this comprehensive guide, we’ll explore the steps and considerations involved in painting a dining room, providing you with tips and inspiration to achieve a stunning transformation.
Choosing the Right Color: Setting the Tone
The first step in any successful paint project is choosing the right color. Consider the mood you want to create in your dining room. Warm tones like reds and yellows can stimulate conversation, while cool blues and greens promote a serene atmosphere. Neutrals offer versatility and a timeless appeal. Samples and swatches can help you visualize the color in your specific space.
Preparation: Setting the Stage for Success
Proper preparation is key to a flawless paint job. Start by clearing the room of furniture
Renew Your Space: Repairing a Cracked Wall

Renew Your Space: A Comprehensive Guide to Repairing a Cracked Wall
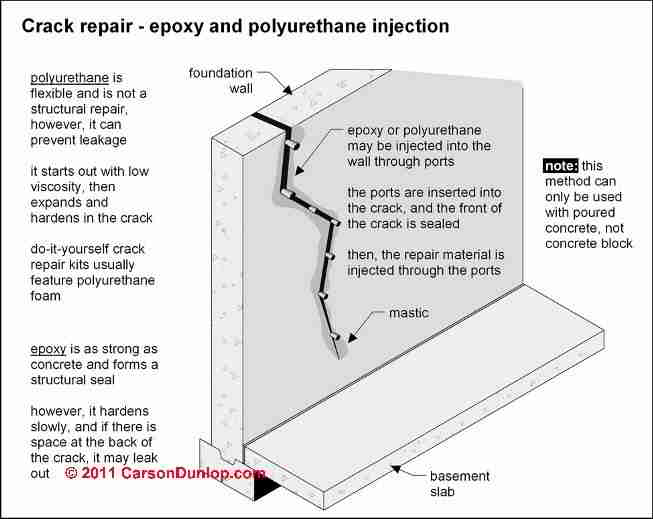
Cracks in your walls can be unsettling, but fear not – they are a common issue that can be addressed with the right knowledge and techniques. In this guide, we’ll take you through the steps of repairing a cracked wall, restoring your space to its former glory.
Understanding the Causes: Identifying the Culprits
Before diving into repairs, it’s crucial to understand the root causes of wall cracks. Common factors include settling of the foundation, temperature fluctuations, or even moisture-related issues. Identifying the underlying cause helps in implementing the most effective repair strategy.
Assessing the Severity: Determining the Type of Crack
Not all cracks are created equal. Some may be superficial, while others indicate more significant structural issues. Assess the severity of the crack by examining its size, location, and any accompanying signs like bulging or uneven surfaces. This evaluation
Effortless Comfort: Installing a New Thermostat

Effortless Comfort: Installing a New Thermostat
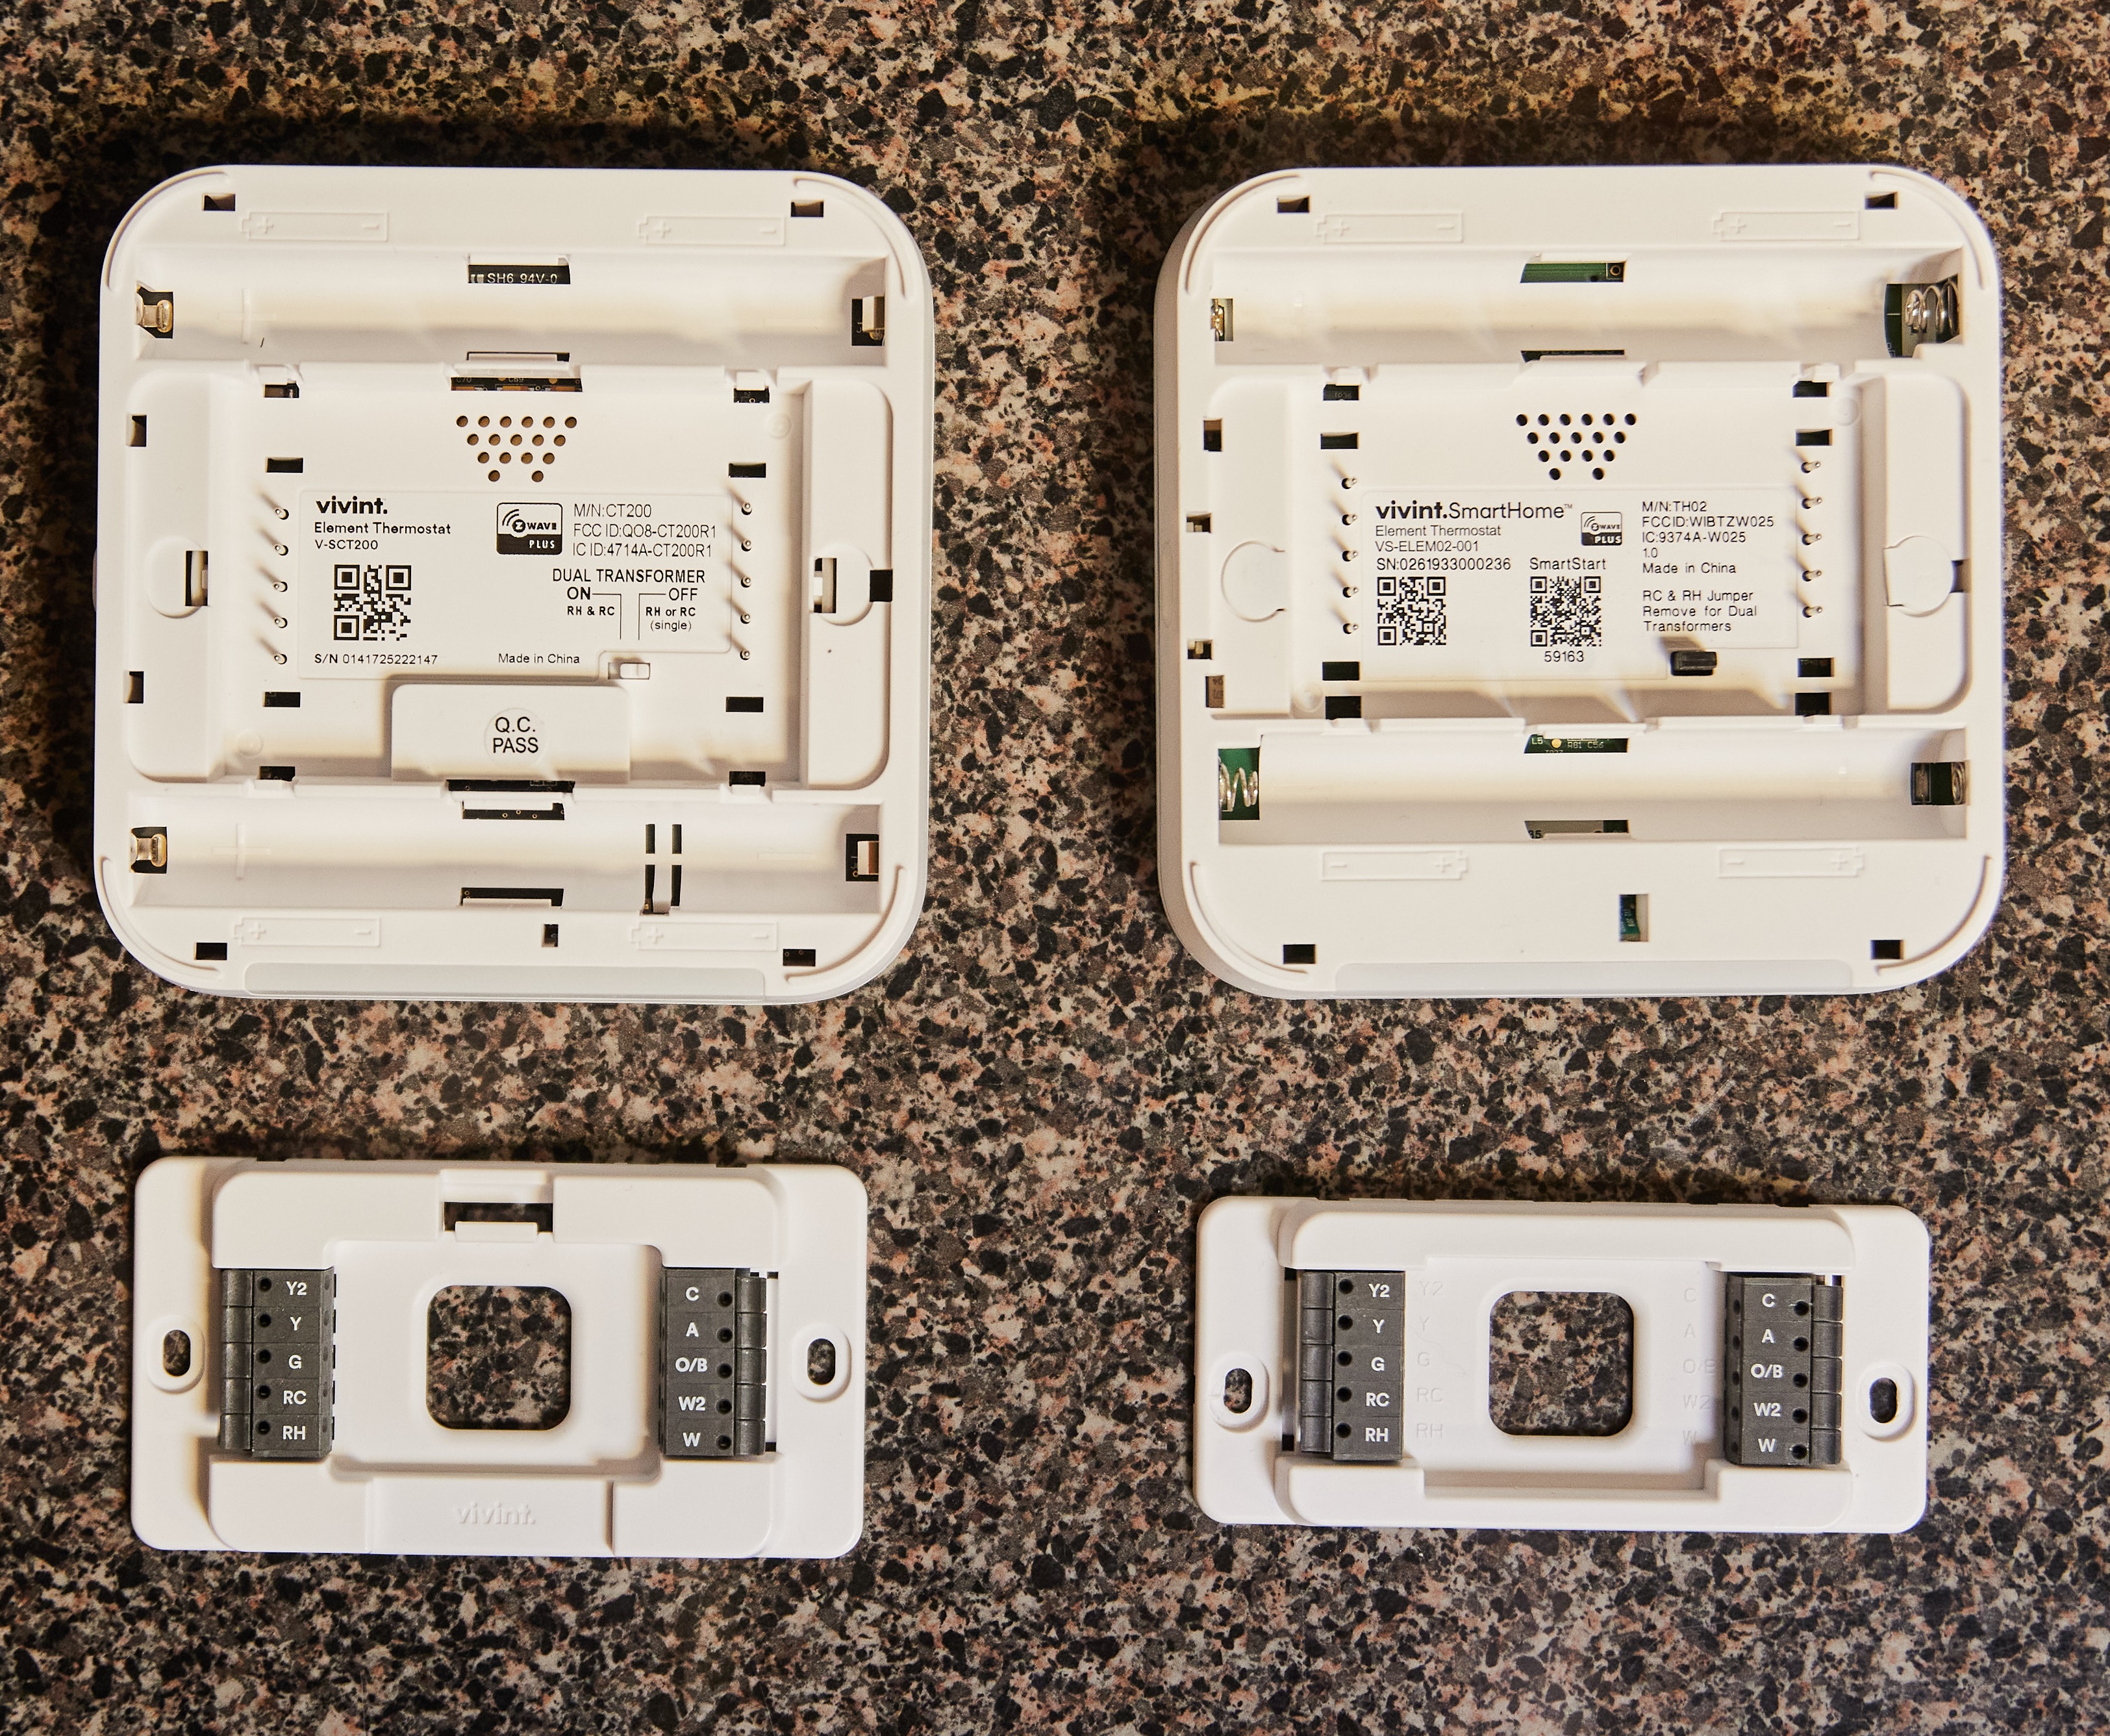
Upgrading to a new thermostat not only enhances your home’s energy efficiency but also provides you with greater control over your indoor climate. Follow this comprehensive guide to seamlessly install a new thermostat and elevate your comfort.
**1. Choose the Right Thermostat:
Before diving into the installation process, select a thermostat that suits your needs. Whether you opt for a programmable, smart, or basic model, ensure compatibility with your heating and cooling system. This initial step sets the foundation for a successful installation.
2. Turn Off Power:
Safety is paramount when dealing with electrical components. Begin by turning off the power to your heating and cooling system at the circuit breaker. This precautionary measure ensures a safe environment for the installation process.
3. Remove the Old Thermostat:
Carefully remove the cover of your existing thermostat to expose the wiring. Take note of the wire
Upgrade Your Entrance: Easy Steps to Replace a Doorknob

Upgrade Your Entrance: Easy Steps to Replace a Doorknob
Enhancing your home’s aesthetic starts with small yet impactful changes. Follow this step-by-step guide to effortlessly replace a doorknob and elevate the overall appeal of your doors.
Assessing the Existing Doorknob:
Before diving into the replacement process, assess the existing doorknob. Determine if it’s a passage, privacy, or keyed doorknob. This assessment helps you choose a suitable replacement and ensures compatibility with the door’s function.
Gathering the Right Tools:
Ensure you have the necessary tools for the replacement. Common tools include a screwdriver, tape measure, and possibly a drill. Verify the requirements based on the new doorknob’s installation instructions, and have everything ready before starting the project.
Selecting the Replacement Doorknob:
Choose a replacement doorknob that complements your home’s style and meets your functional needs. Consider finishes, designs, and security features. Take note of the doorknob’s backset measurement, ensuring it matches
Upgrade Your Entrance: Easy Steps to Replace a Doorknob

Upgrade Your Entrance: Easy Steps to Replace a Doorknob
The doorknob is a small yet essential component of any door, contributing to both functionality and aesthetics. Whether you’re looking to enhance the style of your entryway or need to replace a worn-out doorknob, the process is simpler than you might think. Here’s a step-by-step guide to effortlessly replace a doorknob and give your door a fresh, stylish look.
1. Assessing the Current Doorknob
Before diving into the replacement process, assess the current doorknob. Determine whether it’s a simple passage knob, a privacy knob with a lock, or an entry knob with a keyhole. Understanding the existing setup will guide you in selecting the right replacement doorknob.
2. Choosing the Right Replacement
Selecting a replacement doorknob involves considering both functionality and design. Choose a doorknob that matches your door’s requirements – passage, privacy, or entry. Additionally, explore various styles and finishes
