Renew Your Space: A Comprehensive Guide to Repairing a Cracked Wall
Cracks in your walls can be unsettling, but fear not – they are a common issue that can be addressed with the right knowledge and techniques. In this guide, we’ll take you through the steps of repairing a cracked wall, restoring your space to its former glory.
Understanding the Causes: Identifying the Culprits
Before diving into repairs, it’s crucial to understand the root causes of wall cracks. Common factors include settling of the foundation, temperature fluctuations, or even moisture-related issues. Identifying the underlying cause helps in implementing the most effective repair strategy.
Assessing the Severity: Determining the Type of Crack
Not all cracks are created equal. Some may be superficial, while others indicate more significant structural issues. Assess the severity of the crack by examining its size, location, and any accompanying signs like bulging or uneven surfaces. This evaluation guides you in determining the appropriate repair approach.
Gathering the Tools and Materials: Preparation is Key
Preparation is key to a successful wall repair. Gather the necessary tools and materials, including joint compound, putty knife, mesh tape, sandpaper, and primer. For larger cracks, you may need additional materials like drywall patches or adhesive. Having everything on hand streamlines the repair process.
Surface Preparation: Clearing and Smoothing the Area
Before applying any repair materials, prepare the cracked area by removing loose debris and smoothing the surface. Use a putty knife to gently scrape away any loose paint, plaster, or drywall. Sand the area to create a smooth and even surface for the repair materials to adhere properly.
Filling Small Cracks: Applying Joint Compound
For small cracks, joint compound is an effective solution. Apply a thin layer of joint compound over the crack using a putty knife. Smooth it out to blend with the surrounding wall, and allow it to dry completely. Sand the area lightly to achieve a seamless finish before priming and painting.
Addressing Larger Cracks: Utilizing Drywall Patches
Larger cracks may require the use of drywall patches. Place the patch over the crack, ensuring it covers the entire damaged area. Apply joint compound over the patch, feathering the edges for a smooth transition. Once dry, sand the surface, and proceed with priming and painting to match the surrounding wall.
Using Mesh Tape for Reinforcement: Strengthening Weak Areas
Mesh tape is an excellent reinforcement for cracks that may reappear over time. Apply the mesh tape over the crack, pressing it firmly to adhere. Cover the tape with joint compound, feathering the edges. The mesh tape provides additional strength to prevent future cracks from forming in the same area.
Dealing with Structural Issues: Consulting a Professional
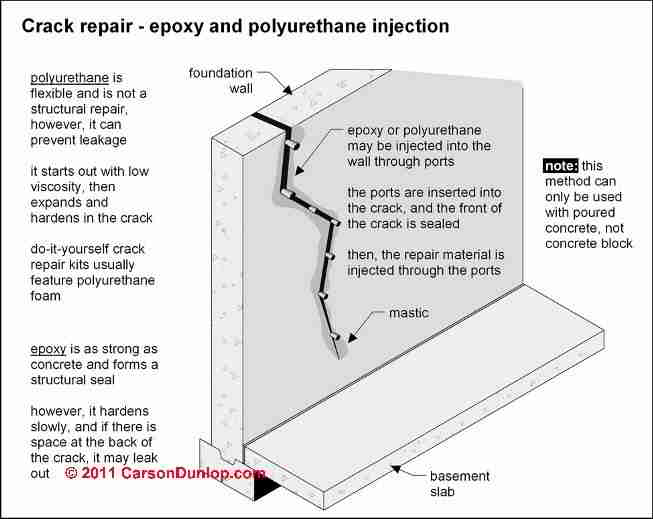
In some cases, cracks may indicate underlying structural issues that require professional assessment. If you notice extensive or recurring cracks, especially those accompanied by other signs like doors sticking or uneven floors, it’s advisable to consult a structural engineer or professional contractor for a thorough inspection.
Preventive Measures: Avoiding Future Cracks
Once you’ve repaired the cracked wall, implementing preventive measures is crucial to avoid recurrence. Address any drainage issues around your home, maintain consistent indoor humidity levels, and monitor foundation settling. These preventive measures contribute to the long-term stability of your walls.
Final Touches: Priming and Painting for a Seamless Finish
With the repair complete, finish the process by priming and painting the repaired area. Use a high-quality primer to ensure proper adhesion, followed by matching the paint to the rest of the wall. This final step not only conceals the repair work but also provides a cohesive and seamless finish.
Explore DesigningTemptation.com for More Home Tips
For additional home improvement tips, including expert advice on repairing cracked walls and transforming your living spaces, visit DesigningTemptation.com. The website offers a wealth of resources to inspire and guide you through various home improvement projects.
Conclusion: A Renewed and Resilient Wall
Repairing a cracked wall is a manageable task with the right knowledge and tools. By understanding the causes, assessing the severity, and following proper repair techniques, you can restore your space to its former glory. With a renewed and resilient wall, your home will maintain its aesthetic appeal and structural integrity for years to come.


