Introduction
Light fixtures play a crucial role in shaping the ambiance of a space. If you’re looking to refresh your home’s lighting and give it a modern touch, replacing a light fixture is a simple yet impactful project. In this guide, we’ll walk you through the process, providing easy steps to upgrade your space.
Assessing Your Current Fixture
Before diving into the replacement process, take a close look at your current light fixture. Assess its design, functionality, and any issues you may have encountered. Understanding the existing fixture will guide you in selecting a suitable replacement that aligns with your aesthetic preferences and lighting needs.
Choosing the Right Replacement
Selecting the right replacement is key to a successful light fixture upgrade. Consider factors such as the size of the space, the type of lighting required (ambient, task, or accent), and your personal style. Whether you opt for a modern pendant, a classic chandelier, or a sleek flush mount, choose a fixture that complements your overall interior design.
Gathering Necessary Tools and Materials
Once you’ve chosen the replacement fixture, gather the necessary tools and materials for the installation. Common tools include a screwdriver, wire stripper, pliers, and a voltage tester. Additionally, ensure you have the appropriate electrical wiring and connectors. Safety is paramount, so if you’re unsure, consult an electrician or a professional for assistance.
Turning Off Power and Ensuring Safety
Before starting the replacement process, turn off the power to the existing light fixture at the circuit breaker. Use a voltage tester to ensure that the power is indeed off before proceeding. Safety is of utmost importance during any electrical work, so take necessary precautions and, if in doubt, seek professional help.
Removing the Old Fixture
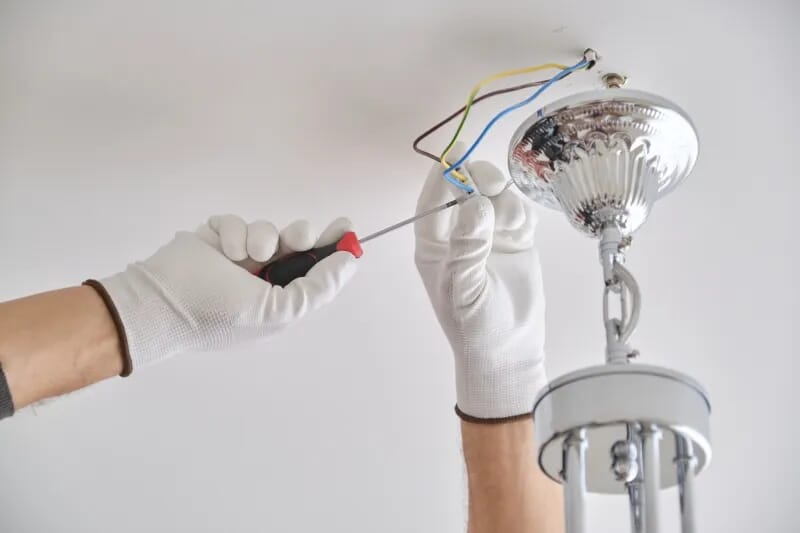
Carefully remove the old light fixture by unscrewing the mounting screws and disconnecting the wires. Pay attention to the wiring setup, as this will guide you in installing the new fixture. Take note of any ceiling or wall markings indicating the placement of the electrical box for reference.
Installing the New Fixture
With the old fixture removed, follow the manufacturer’s instructions to install the new one. Connect the wires using wire connectors, matching the corresponding colors (usually black to black, white to white, and ground to ground). Secure the fixture in place by tightening the mounting screws. Double-check your connections to ensure a secure and safe installation.
Testing the New Fixture
Before securing the fixture entirely, turn the power back on and test the new light. Ensure that all bulbs are working correctly and that the light switch operates as intended. If everything checks out, finalize the installation by securing the fixture in place and making any necessary adjustments.
Adding Finishing Touches
Once your new light fixture is securely installed and functioning, take a moment to appreciate the transformed ambiance of your space. Adjust the height or positioning if needed, and consider adding any finishing touches, such as decorative bulbs or shades, to enhance the overall look.
Cleaning Up and Recycling
Dispose of the old light fixture responsibly by recycling or donating if possible. Clean up the work area and ensure that no tools or debris are left behind. This final step ensures a safe and tidy completion of your light fixture replacement project.
Conclusion
Replacing a light fixture is a rewarding DIY project that can instantly elevate the look and feel of your home. By following these easy steps and ensuring safety throughout the process, you can achieve a stylish and functional lighting upgrade. For more inspiration and tips on lighting design, visit DesigningTemptation.com.


